Wednesday, July 27, 2011

Affianced!

On July 16th, 2011, Ian asked me to marry him! I have the ring to prove it! I was up in Rhode Island to visit him for his birthday (he was there for some training), and we had a fancy smancy dinner planned for Saturday night. Before we went to dinner, we drove around some and looked at all the gorgeous mansions/castles. We still had some time left, so we pulled off at an overlook and sat on a bench with a wonderful view of the rocky beach below us and the sun about to set. Ian said he was going to go back to the car to get the camera, and when he came back I knew something was up because he was acting funny! It took him a little while, but he got up the nerve and asked me if I would be his forever! I don't know why he was so nervous -- did he think I would say no!?! Afterwards, we celebrated at a local restaurant with some delicious food and a half bottle of champagne. I know that I am so happy, and I can't wait to spend my forever with Ian.

Here's the last picture of us before being engaged! (It was very windy, hence the crazy hair.)

Although we probably won't even be able to set a date until Christmas or so, we are hoping to tie the knot sometime in spring or early summer 2013. I know it's a long way out, but unfortunately with Ian being in the Navy and me being in graduate school, it's the earliest that we will actually be able to live together. And you know, married people tend to want to live together.

As for now, Ian and I are staying occupied by work and by looking into different aspects of the wedding. We have some ideas for what we want for most parts of the wedding. We're trying to do this on a budget. It's strange, though, because to us, the budget we have set is a lot of money, but it's still just over half of what the average wedding costs in the United States! It might not be the easiest to pull off a wedding for what we want to, but we are going to do it.

We're just so excited, both for the wedding and for everything that comes afterwards!

Tuesday, June 28, 2011

The blog is back!

So after a very busy summer and a deployment for Ian, I think we're ready to get this blog going again. And I've decided to post things about life, and not just food. And by life I mean that I'll probably be posting about running and crafts. Not that I've talked to Ian about it, but he'll know soon. I love you, Ian!

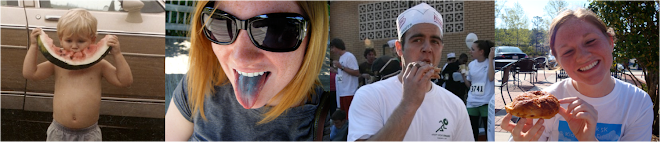
Thunder Road Marathon Finish
December 12, 2009
I've run two marathons so far: the Charlotte Thunder Road Marathon and the Virginia Beach Shamrock Marathon. Both times, I had some issues with my iliotibial band during training and in the race. Usually switching to a new pair of shoes helped; however, when I was training for the second marathon, nothing helped. I used Brooks Ravenna shoes for both training/marathons, and I swore by them. I don't even know how many pairs I've gone through in the past few years.

Shamrock Marathon (~mile 13)
March 20, 2011
Earlier this year, though, I read "Born to Run" and decided to try out some Vibram FiveFingers. I made my way to REI (the only store in the area that carried them and actually had them in stock), and decided on the Bikila model.

My Vibram FiveFingers (Bikila model)

The salesperson warned me to start out slow, and I had read all of the warnings on the internet, so I did. I alternated "normal" shoes with my VFFs. I did a short walk in them first. No pain. I ran a mile or so. No pain. I ran 3 miles. No pain. I ran 5 miles. No pain. To be honest, I was hoping for some pain; you know, that "I worked out so now I'm sore" pain? I love it! So I was disappointed when I didn't feel it.

To date, I think the longest I've gone in my VFFs is 5 miles. I absolutely LOVE them, though! Like I mentioned, I had a lot of ITB pain during my training for both of the marathons (and between, and after), but once I started wearing the VFFs, there was no more ITB pain for me. Afterwards, my feet do feel like they've been pounded a bit, but it is way better than ITB pain.

I had a Groupon for some running shoes that was about to expire, so I got a pair of Brooks Ghost (they didn't have VFFs in that store). They felt okay in the store, but when I tried to run with them, it was painful! I don't think I even got 0.1 mile before I had to turn around. Every part of my leg below my knee ached.

Admittedly, I'll sometimes have some "pain" in my calfs, and recently in my arch. The calf "pain" isn't really what I would consider pain, but rather more of a "stretching" feeling the next day, particularly on steps. The arch pain is like a cramp that happens when I'm running.

Even with this little bit of calf/arch discomfort, I'm so happy with my VFFs, and Ian even decided to get a pair (he got the male Bikila model). Ian and I started half marathon training yesterday, and I'm going to see if I can do all of my training/race in VFFs.

Wednesday, June 16, 2010

Chicken and Dumplings

Chicken&Dumplings (1)

Here is a new spin on Chicken and Dumplings.  It’s baked chicken breast stuffed with Havarti cheese and breaded with crumbed pretzels. The dumplings are made with whole wheat pancake mix.


Ingredients for two servings:

1 Large chicken boneless skinless chicken breast 
1 cup whole grain pancake mix 
1 ounce Havarti cheese 
1/2 cup mini pretzels (I like the unsalted ones) 
1/2 cup skim milk


Directions for chicken: 
1. Trim the chicken breast and cut in half widthwise. Butterfly the two halves and place 1/2 once of cheese inside. 
2. Place the chicken in a baking pan and sprinkle with crumbled pretzels. 
3. Bake at 375° for approximately 30mins or until done.

Directions for dumplings: 
1. Combined the pancake mix and milk in a bowl and knead until a stiff dough is formed. 
2. Make golf ball sized dumplings out of the dough.
3. Place the balls into salted boiling water and cook for about 20min flipping then halfway through.

Chicken&Dumplings (2)

Monday, June 7, 2010

Roasted vegetable wrap with feta and rice with baked potato strips

The other night, I decided to recreate my favorite meal, with some modification of course, from The Mad Hatter, a bakery in Durham. I took the pictures, which is why they aren't very good. Ian's much better at taking the pictures!!! Regarding the nutritional ratio, it's a little heavy on the carb (I tend to do that) and fat sides, but a little light on the protein. You could add chicken to make it a little more balanced.

Ingredients:

1/2 of a yellow squash
1/2 of a zucchini
1/8 of a white onion
1/4 of a green pepper
1 serving of white rice (I like Dynasty for its flavor and consistency)
1 serving of tomato and basil feta cheese
1 medium red potato
1 wheat wrap

Directions:
1. Begin cooking the rice - this probably will take the longest.
2. Cut up the potato into thin slices. Toss in a Ziploc bag with a little oil and paprika.
3. Cut up the vegetables into slices and roast the vegetables and potatoes at 450°F until they are done. I used a cookie sheet for the vegetables and a pizza pan with holes for the potatoes.
4. Place the rice on top of the wrap, layer with the cheese and the roasted vegetables.

Nutritional Information for 1 serving:
432.8 calories
11.63 g fat
25 mg cholesterol
757 mg sodium
62 g carbohydrates
9 g sugars
8 g fiber
13 g protein

Tropical Grilled Chicken and Rice

Here is a fresh and healthy spin on the old chicken and rice.

TropicalGrilled Chicken 
Ingredients (for 2 servings):
2 4 oz. Thin sliced chicken breasts
1 Lime
1 Mango
1 Kiwi
1 Peach
4-5 Medium strawberries
1/4 cup  Fresh cilantro
1/2 cup Whole grain brown rice
1/4 cup Reduced fat feta cheese

Directions:
1. Start cooking the rice as the package directs. I would advise starting this well in advance of the chicken as it will take about 45-50min.
2. Wash, peel, and cut the mango, peach, kiwi, and strawberries into ~1/4” cubes.
3. Dice the cilantro and combined with the fruit and juice from the lime.
4. Grill the chicken.
5. Spoon the salsa on top of the chicken and rice.
6. Sprinkle with feta

Nutritional information (for one servings):
390 calories
6 g fat
75 mg cholesterol
237 mg sodim
52.9 g carbohydrates
6 g sugar
4 g fiber
30.8 g protein

Monday, May 31, 2010

Flatbread Personal Pizzas

We decided to make easy and fast pizzas – much healthier and much more filling than you would find in the frozen section of the grocery store!
FlatBreadPizza5
Ingredients (for 2 personal pizzas):
FlatBreadPizza1
1 package of Fabulous Flats Tandoori Naan (contains 2 flatbreads)
1/4 cup Ragu Pizza Sauce
3/4 cup low moisture part skim mozzarella cheese
2 slices of Hillshire Farm Hearty Slices Chicken
1/2 cup frozen pepper and onion stir-fry vegetable mix
You may want to add some garlic powder or use a salty cheese like parmesan to add some more flavor.

Directions:
1. Warm up the peppers and onions. We really didn’t need to take a picture of this, and we probably could have used a bigger pan, but Ian wanted to do it in his little pan and take a picture!
FlatBreadPizza22. Spread about half of the sauce on each flatbread.FlatBreadPizza3
3. Sprinkle about 1/4 cup of cheese over each flatbread.
4. Place small pieces of chicken on the flatbreads (1 slice per pizza).
5. Sprinkle about 1/8 cup of the cheese on each flatbread, over the chicken.
6. Place warmed vegetables on the flatbreads.
7. Bake at 400°F for about 10 minutes, until the cheese is melted.

Nutritional information (for one flatbread pizza):
466 calories
16 g fat
48 mg cholesterol
1378 mg sodim
62 g carbohydrates
6 g sugar
8 g fiber
28 g protein 

Microwave potato chips with carrots and onion dip

We wanted a quick and easy snack, and what’s better than potato chips? Regular potato chips that you buy are always too greasy and too salty, so we decided to make our own!

MicrowaveChips

Ingredients:
1 potato
Salt and pepper
Olive oil spray
1 container of plain Greek yogurt
~1/2 packet of Hidden Valley Garden Green Onion Dip Mix
Baby carrots

Directions:
1. Slice about 1/3 of the (washed) potato as thin as you can.
2. Lay the potato slices in a single layer on a piece of parchment paper that has been spritzed with olive oil.
3. Spray the tops of the potato slices with olive oil and sprinkle with salt and pepper.
4. Place parchment paper with potatoes in microwave, but turn off the rotating function.
5. Microwave on high for about 4-5 minutes, until the chips are crispy and brown.  You may need to rearrange them halfway through for even cooking.
6. Repeat steps 1-5 with the rest of the potato.
7. To make the dip, mix about half the packet (do this slowly and taste until you feel like it’s the right amount) with the Greek yogurt. It is best to let it sit for a few minutes to develop the flavors.
8. Serve the chips with the baby carrots and the dip.